how to check correct overwrite in scribus
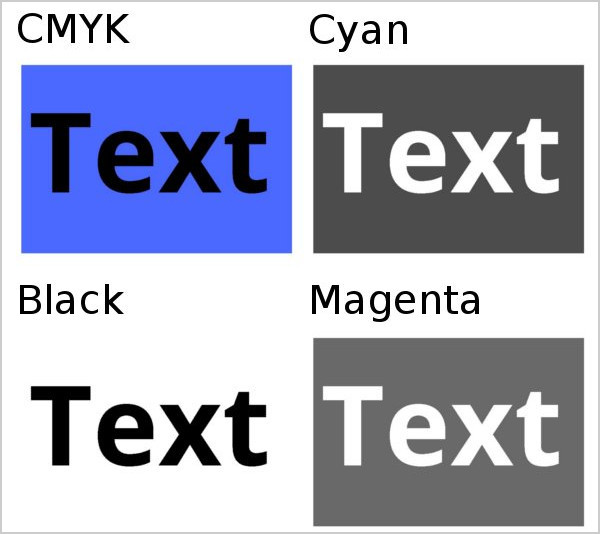
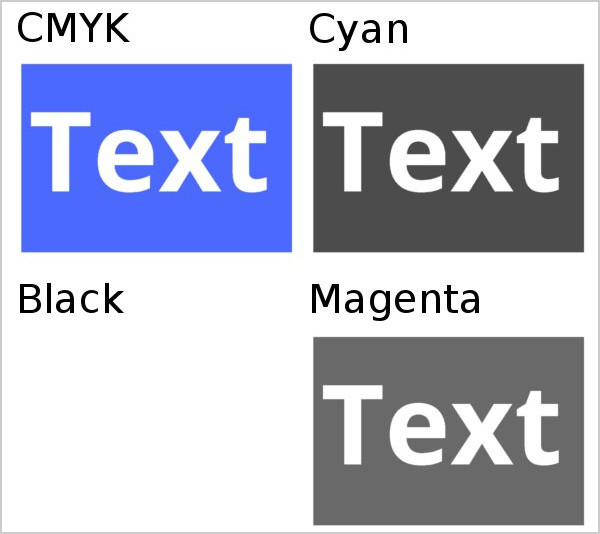
Overwrite is very important for printing. It’s make the result a 100% black element viewed smoothly and clearly (There’s no white gap between black element and background). You can see by example.
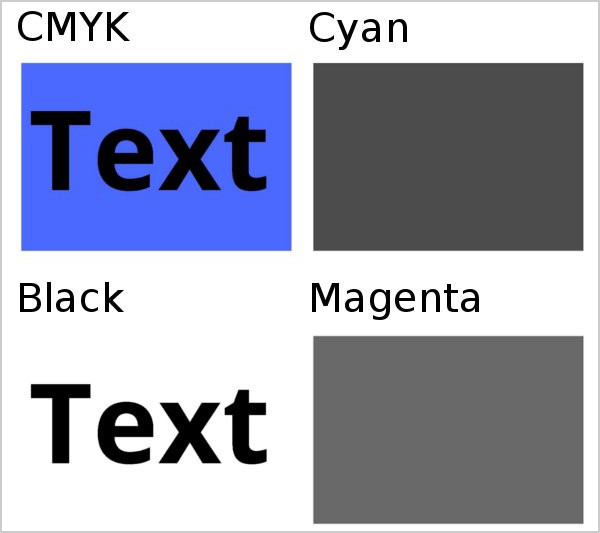
 With overwrite
 No overwrite (Knockout)
In Adobe Indesign, black is overwited by default. But in Scribus you must make it manually. How?
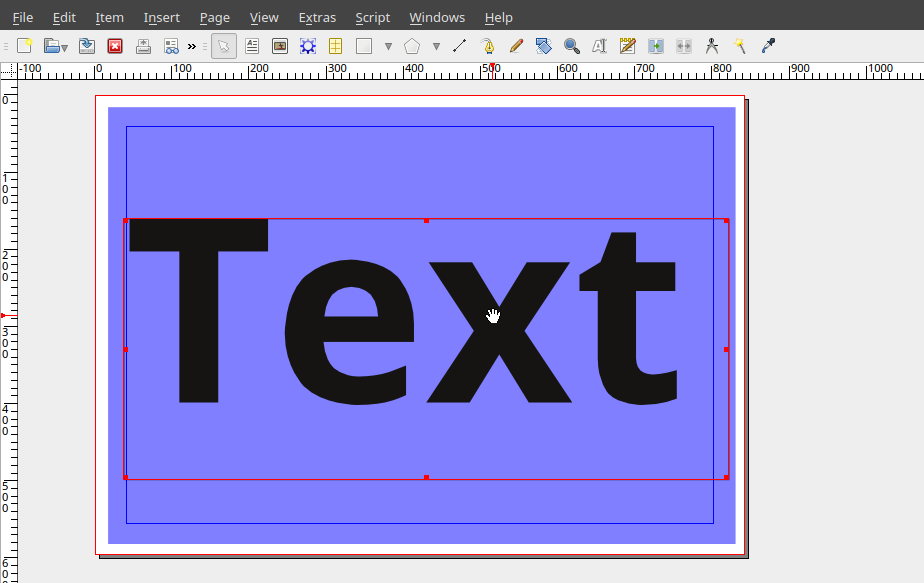
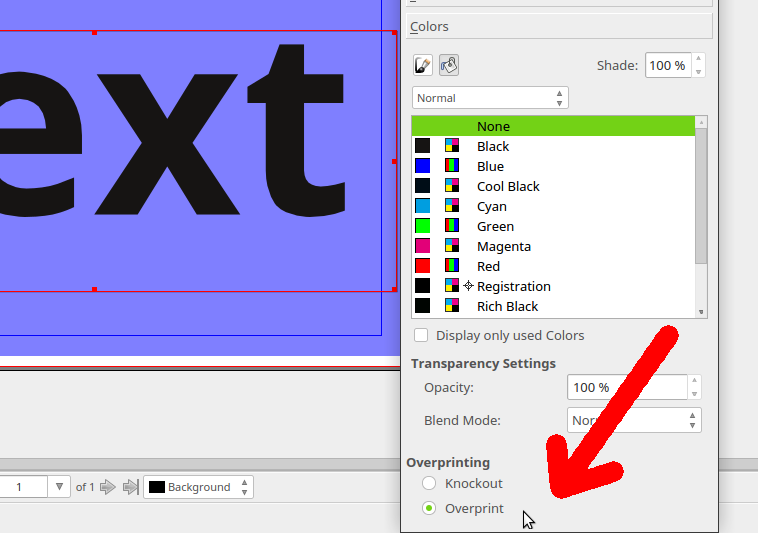
- Click a text frame or shape element (Not the backgroud).
- Find ‘Color’ in Properties menu. Click overwrite.
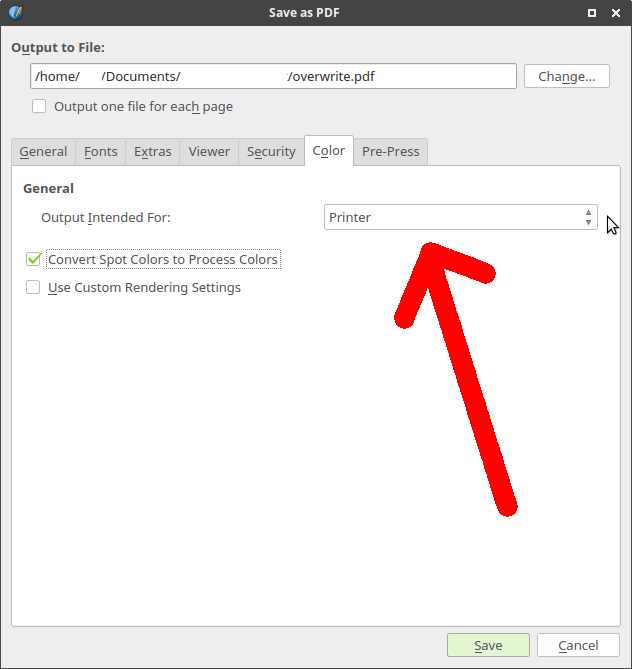
It’s easy make only one element overwrited. But if you have many element that must be overwrited, you must check it. May be you miss some element or clicked wrong element. You can check it with Adobe Acrobat profesional but in Linux (ubuntu) you can check the result with GS Script.
- Export your artwork to PDF. You must choose printer color model certainly.
- Open terminal and write some syntaxt like this
Note: You must change ‘YOUR_GS_RESULT_LOCATION’. For example, /home/user/Documents/gs. And ‘YOUR_PDF_LOCATION/blabla.pdf’. For example /home/user/Documents/test/overwrite.pdf. So, the complete code is…
- Go to result location. Let see the result.
 Correct Overwrite
 No Overwrite (Knockout)
White Element Overwited
Some time you make a white element (text frame or shape) with background. May be you make something wrong (You make white element overwrited). white element overwrited is an fatal error for the printing result. The element overwrited is appear in pdf but not appear in printing result. Let check it with gs script
 Overwrited
 No overwrite (Knockout)